Tutorials: Layers in PSP7
Program Used: Paint Shop Pro 7
Tools Used: Layers Palette, Color Palette, Paint Brush, Floodfill.
What you'll need: PSP7
Basic knowledge of your paint program.
Sense of Humor (I can't be totally serious in tuts. I'm sorry... lol!)
Plenty of patience. ^^'
Disclaimer: Please take note that with tools I've used in this tutorial such as, the "Floodfill" and "Paintbrush" tool, there may or may not be different settings for the tools listed in your program. I will not be going over these tools specifically in this tutorial so you may have to change your settings to suit accordingly. Also, this tutorial focuses primarily on layers in Paint Shop Pro 7, so the program and the elements in the program may look differently or be done differently in older or newer versions.
Layers in PSP7 Tutorial: How To
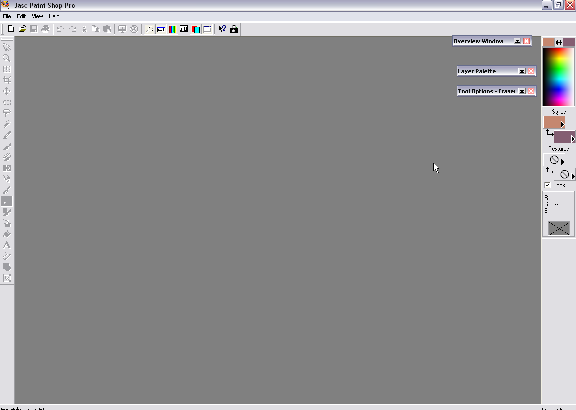
Our first step is opening up PSP7. If you haven't messed with any of your settings, what will pop up next to the color palette area is three tool tabs. These tabs are: the Overview Window, the Layer Palette, and finally, the Tool Options.
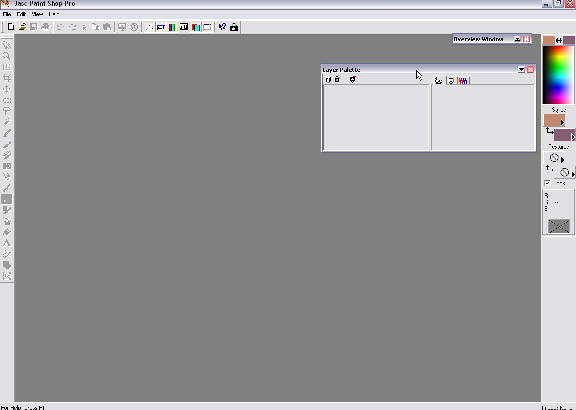
Hovering over any of these tabs will cause the tab to maximize, showing you a whole array of new options and feaures that you can play with or benefit from. That being said, I don't really use the overview window, because it's so easy to just zoom in and out (especially if your mouse as a scrolling in the middle of the right and left moust buttons) of a piece. However, I still have it up and some of you might find it useful.
What you want for this tutorial is the Layer Palette (shown above). Move your mouse over the Layer Palette tab. Pretty isn't it? Hehe! Not really, but it's one of my favorite tools and it really comes in handy when creating dolls and pixels.
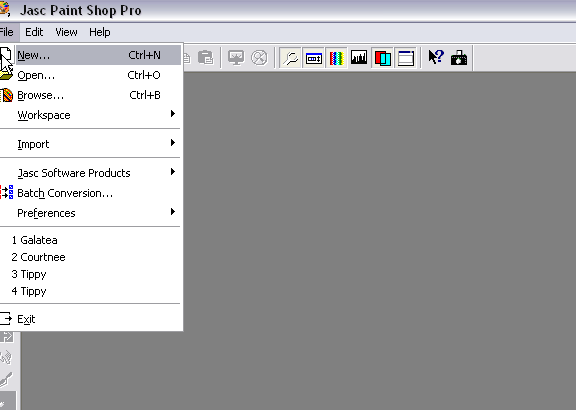
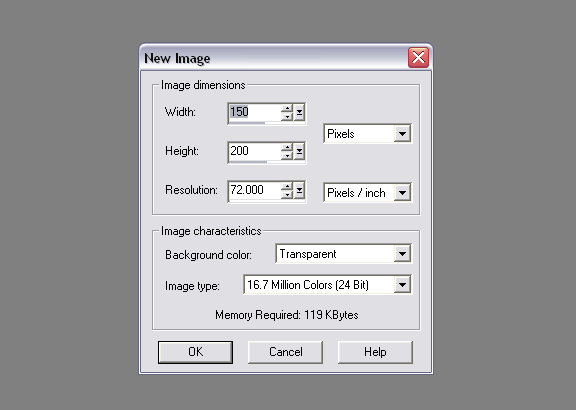
Now to get some actual work done. What I want you to do is go to "File > New" or just press Ctrl+N on your keyboard. This is to start a new project/file on psp. What should pop up is an window just like the one above. There are several features on this window. You can mess with the width and/or height that you want your image to be. I always use a per pixels measurement. We aren't actually going to be creating anything super spectacular here, just messing with layers so I don't have it set to very big. The numbers I have up are from when I was making an avatar doll for The Last Gate (but that is besides the point). Anyway, I usually keep my background color to transparent, but that's my personal preference. You can go ahead and change the settings to how you like it or have it the way I do. Now that you've done that, click the "Ok" button or just hit "Enter" on your keyboard.
On a side note, if you don't know already, there are usually short keys on your keyboard to do things a lot quicker of swifter in just about any program you want, including PSP7. It's just a matter of preference. I personally love the short keys on the keyboard but I will try my best to refer to both during the tutorial for those who don't share my sentiment.
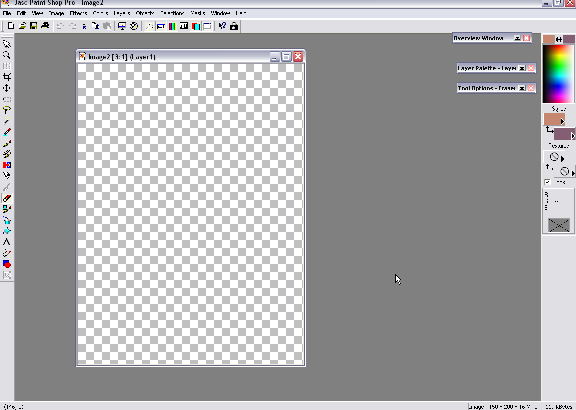
Okay, so we have our new canvas open. I've already zoomed in quite a bit on my canvas, using my little scroller on my mouse. You can do that or click the little spy glass in the menu to the left to zoom in and out.
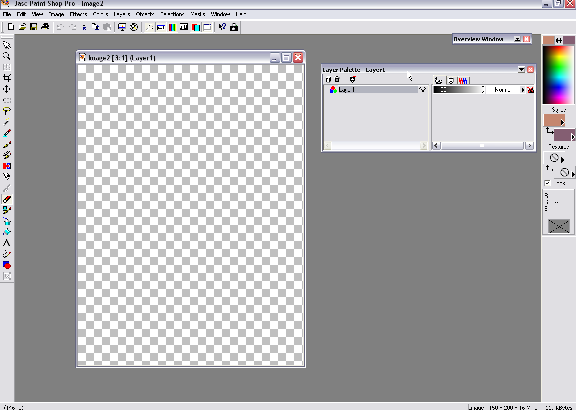
Now, hover over your Layer Palette tab and notice that starting a new project puts you on Layer 1. I don't usually use Layer 1, as I like to put new layers on top of it and have it as a blank base area, so we will ignore it.
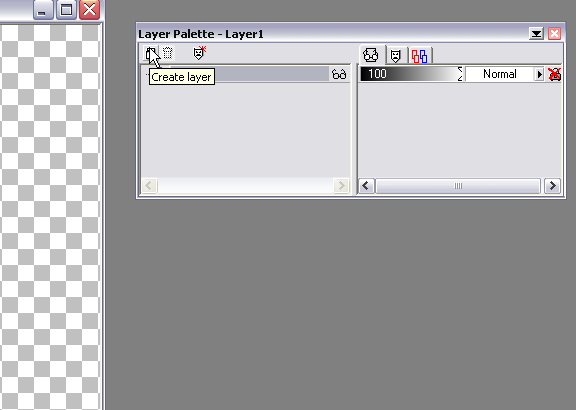
What we are going to do now is create a new layer. Hover over the "page" looking icon on the Layer Palette and then click.
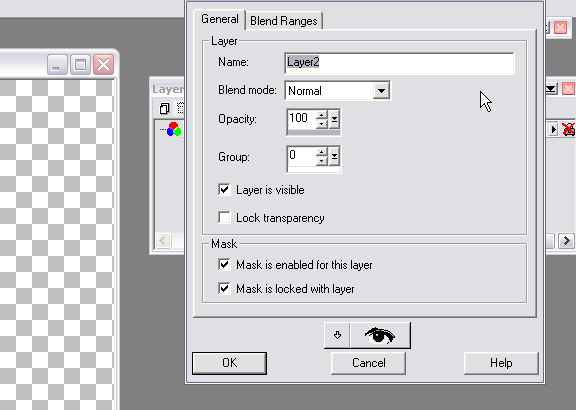
A window, just like this one should pop up. Now you have a whole bunch of things you can do in this window. You can name your new layer and you can change the opacity of the layer. But we won't do any of that right now. Just click "Ok" or press "Enter" on your keyboard.
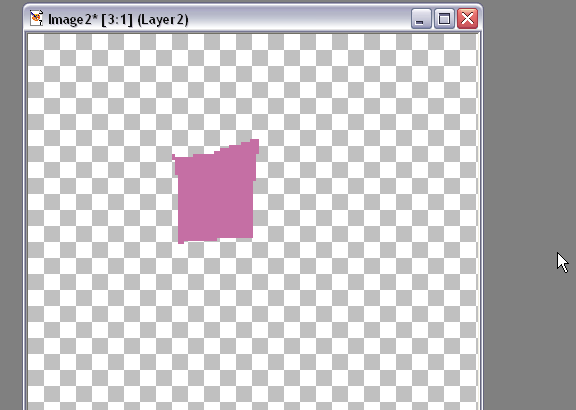
So this isn't a great work of art or even my favorite color but it'll do for this tutorial. We have a lovely pink square that we made by picking a color on the color palatte and drawing it out with a paint brush and floodfilling with the same color. Magic! lol! But this is our Layer 2. Let's make a new layer shall we?
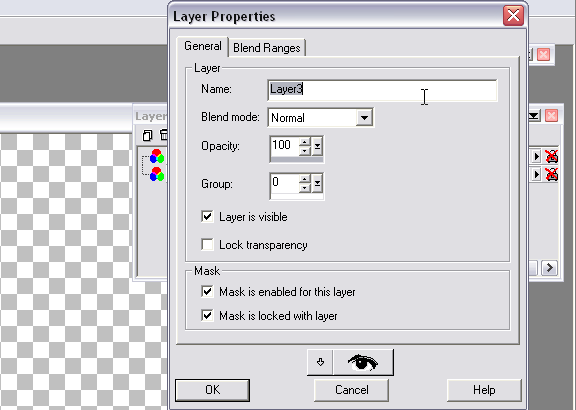
Now, when you work with layers, you have to note that when you create a new layer, it will automatically be created on top of the layer that you were just previously on. So "Layer 3" will go on top of "Layer 2". That being said, don't press "Ok" or hit "Enter" on your keyboard just yet. We are going to give "Layer 3" a generic but less generic name. lol!
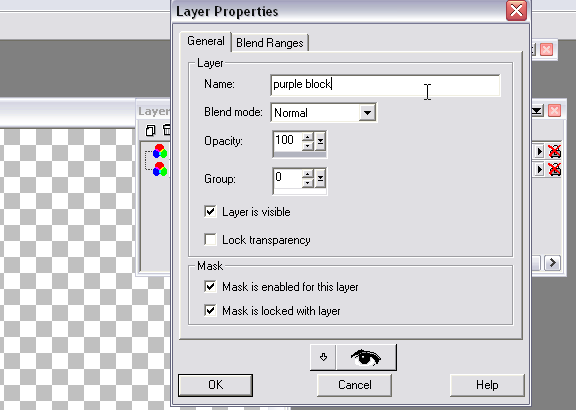
*Points at generic name above* Let's call this layer "purple block". Why you ask? We are getting there dear, young grasshopper. Now that we have named the layer something equally generic, we can now commense my clicking "Ok" or hitting "Enter" on your keyboard.
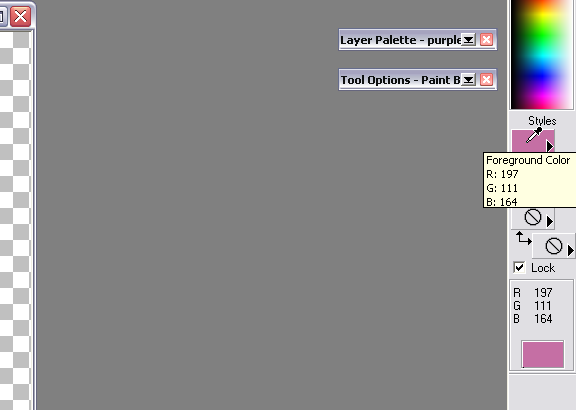
We are now on our "purple block" layer on our canvas. We can continue making pink blocks but let's try another color. So go over to your Palette menu. I like to do so by hovering over the color square directly under "styles" like on the image above. Now that I've directly over the color square, I click on it.
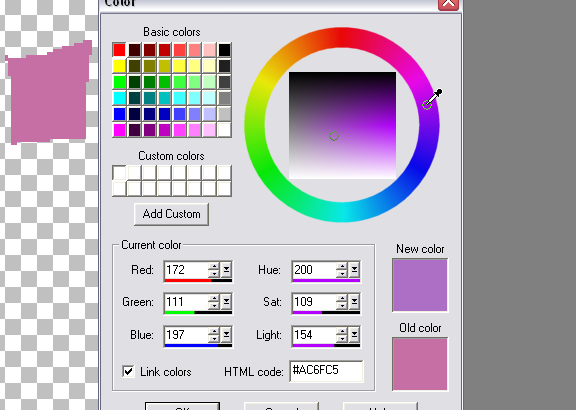
It will open up a new "Color" window for me. And I can play with all the colors I want, as well as type in hex codes. I go over and pick a purple that I want to mess with.
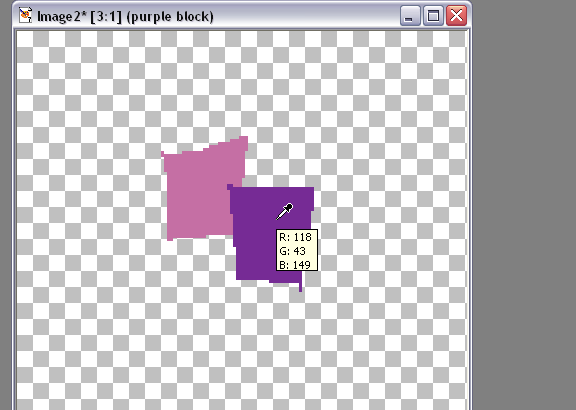
I draw un equally icky square, just like the pink one, with my paintbrush and floodfill it with the same color I used to outline with.
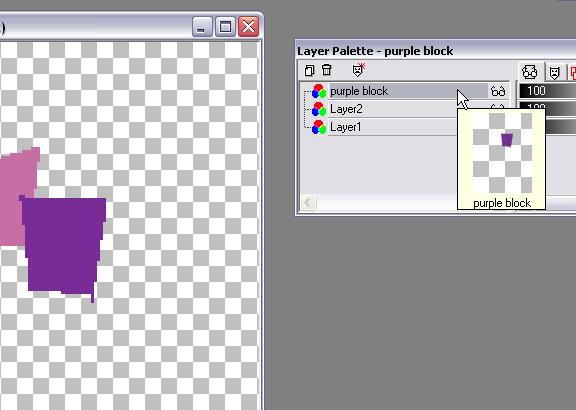
Now, make your way again to the "Layer Palette" and click "purple block". Holding down on your "purple block" layer, drag it so that is falls below "Layer 2".
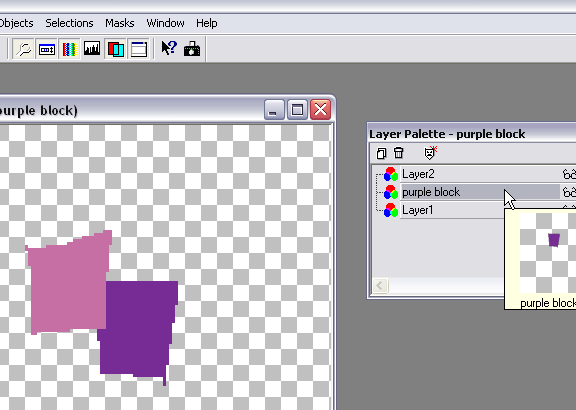
Do you notice anything different? The "purple block" layer is now below our pink square which was "Layer 2". This is to show you that you can move layers below or above any existing layers.
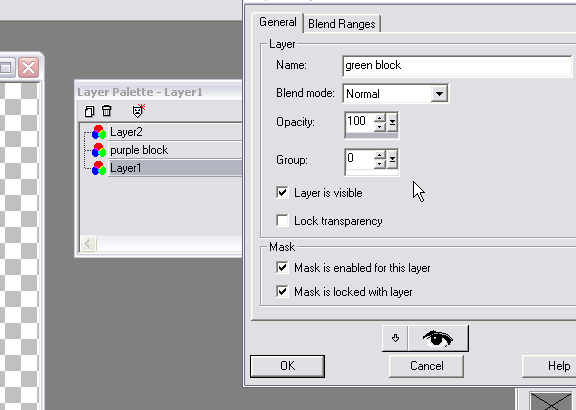
Now if you know that you want a new layer to be below the layer that you were just on, you can definitely do that to begin with. So of course for this part of the tutorial, I will be showing you how to do that. So I click on the layer that is below my "purple block" layer, which is "Layer 1". Now that I'm on "Layer 1", I start a new layer. I'm going to name this one "green block". I'll give you ten guesses why. LOL!
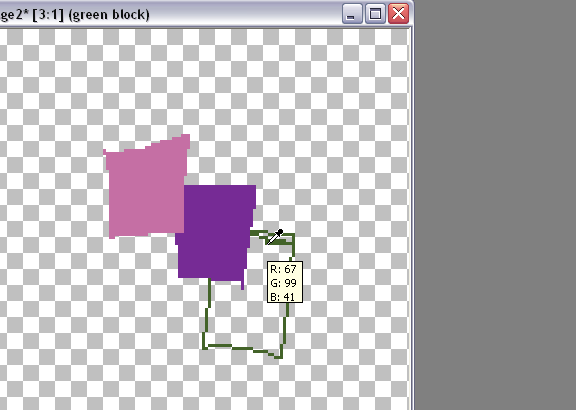
And I start to draw a really craptastic outline. See how it falls under the purple square? You'll find that this is the way I like to shade most of my dolls, pixels, and bases, because you can be just about as messy as you want without anyone seeing your mess below, including yourself.
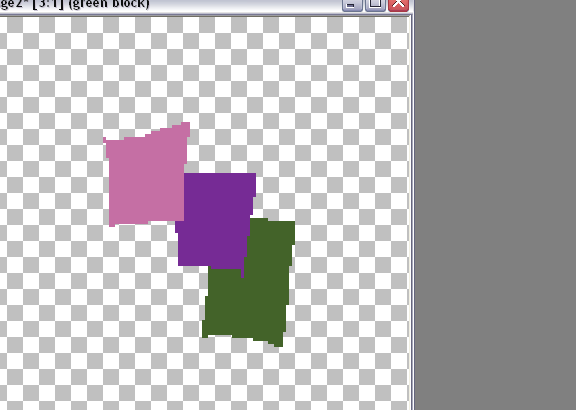
To continue with the theme of this tutorial, we are going to floodfill the green square with the same color.
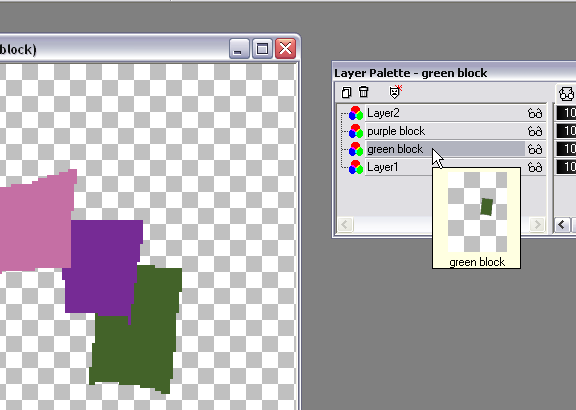
So what if I change my mind and decide that I want the green square over my purple square. Fear not!
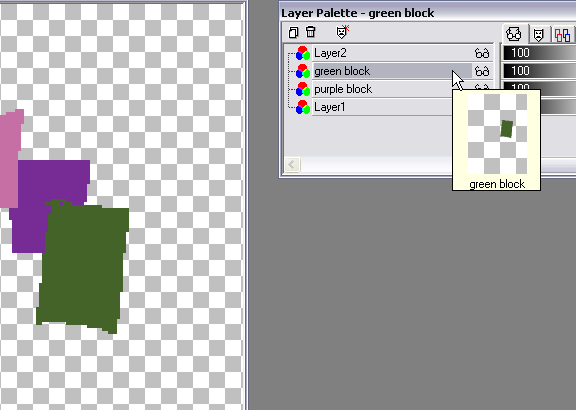
We just do what we did in one of the steps above, except this time, we are moving our "green block" layer over our "purple block" layer but clicking and dragging that layer in our Layer Palette.
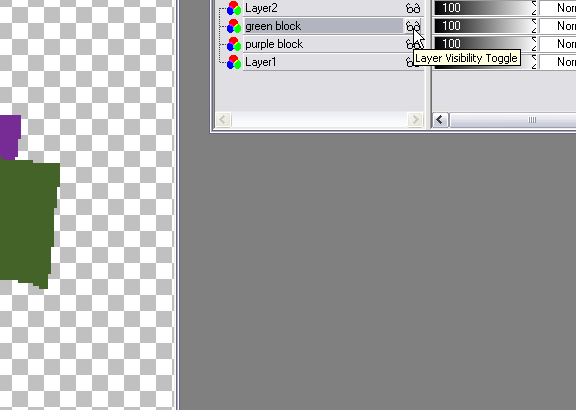
You may have noticed a pair of eyeglasses next to each of the layers in your Layer Palette. Were you wondering what it does? Well, even if you weren't, I'm going to show you. Click on the eyeglass that is beside our "green block" layer.
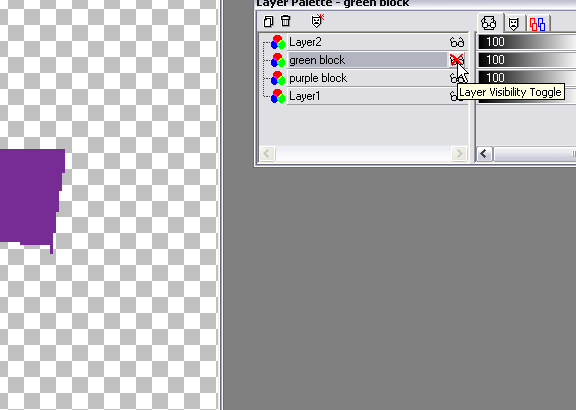
Oh no! It disappeared! Well... lol! That is exactly what it was supposed to do. Clicking the eyeglass option again, will make the layer visible on your canvas once again. This comes in handy when you don't want to see a specific layer, but don't want to delete it either. Let's click the eyeglass again and make our green square visible once more.
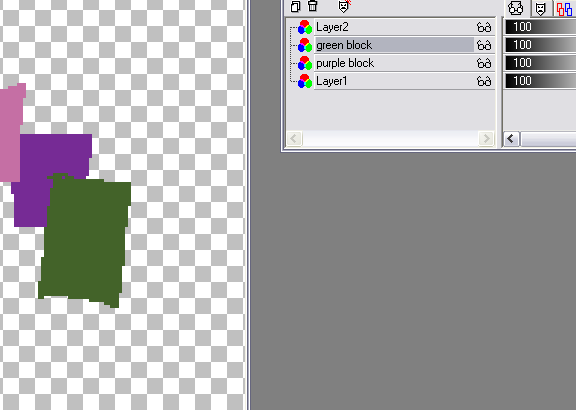
Ain't it purdy?! If we are being honest, you're calling me nuts right now and don't worry, I'm calling myself nuts right along with you. No, I'm afraid we aren't done yet. We've got a few more options to play with.
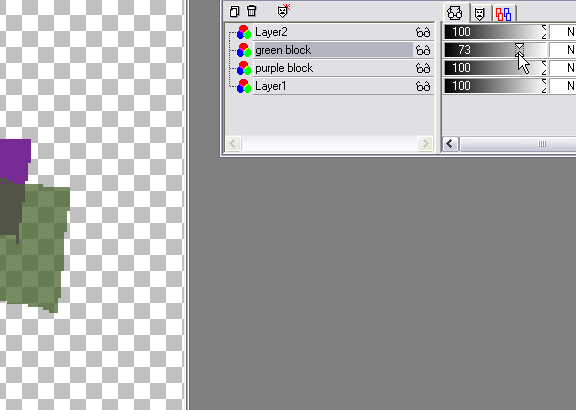
Still on your "green block" layer, make your way over to the sliders that are to your right of the eyeglasses. See how some of them say 100 and our "green block" layer is on 73. Well I've gone ahead and lowered the opacity of the image, by sliding the two arrows that are pointing together. You can slide them all the way from 0-100. 0, being a layer that is not visible and 100 being a layer that is completely visible.
Now that we have all that done, let's move on to something else. I've gone ahead and started a new project. I've also drawn a spiffy heart. No, I'm afraid you aren't going to see anything really impressive in this tutorial. I've also named this layer "Heart" As you can see, I used "Layer1", as it's not there in the Layer Palette.
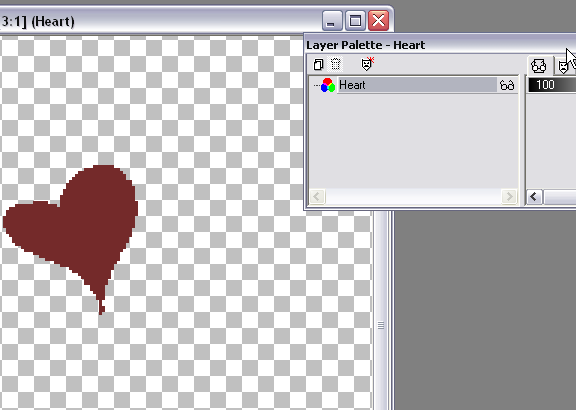
We will now click on "Heart" in our Layer Palette. Or you can just click on the heart or image you've drawn in your canvas.
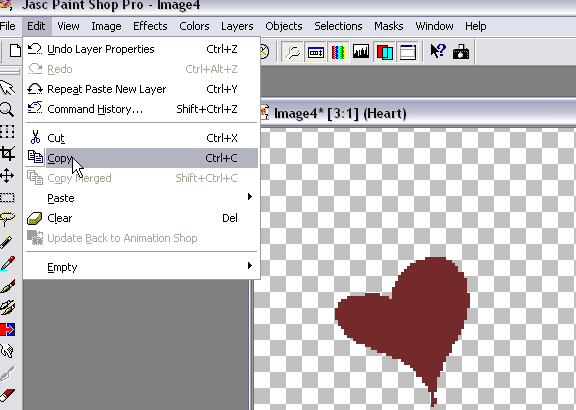
Now that you have that layer/image activated, we are going to copy the image. You can do that by going to "Edit>Copy" or pressing Ctrl+C on your keyboard. What we want to do is to paste this image as a new layer in your current canvas. So clicking "Ctrl+V" will not work here, as it will paste the image on a new canvas.
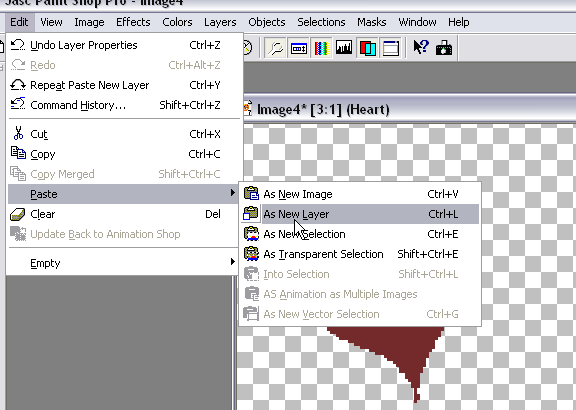
To paste the image as a new layer, what you'll want to do is go to "Edit>Paste>As New Layer" or press "Ctlr+L" on your keyboard.
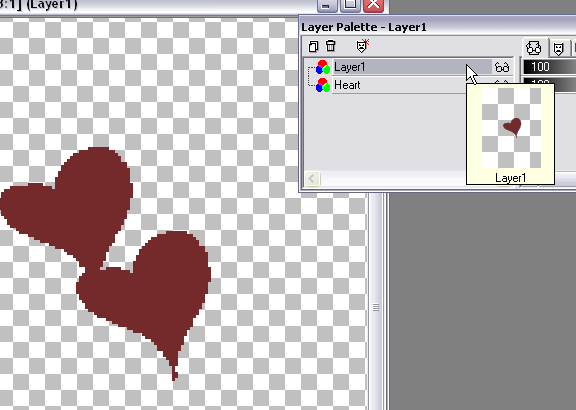
Now you have two sets of hearts. Notice, how the new layer over our "Heart" layer is called "Layer 1". PSP will do this if you don't already have a layer named "Layer 1". You can of course change the name of this new layer if you want, but we won't do that right now.
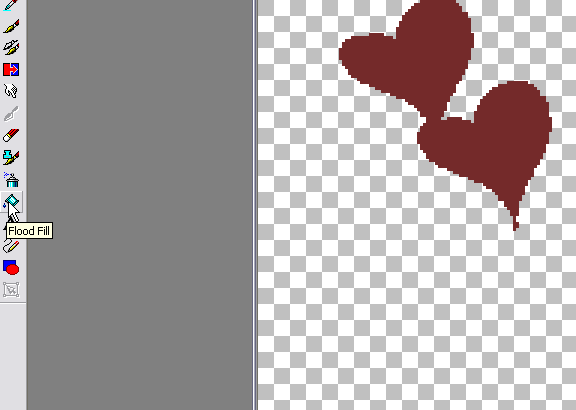
Just for the sake of it, I'm going to change the color of the heart on "Layer 1". I'll do this by clicking the "floodfill" icon on my toolbar to the left. It looks like a paint can tipping over.
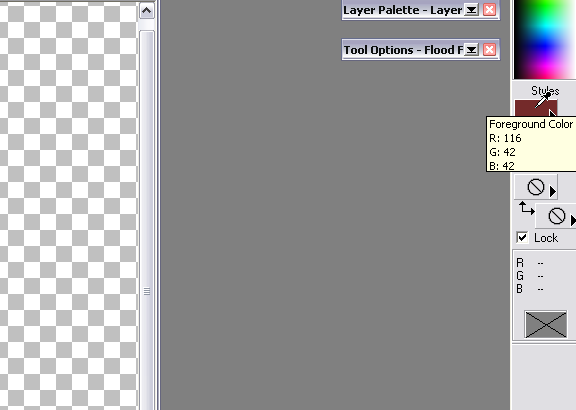
Now I move to my little square. You'll remember this step from one of the previous steps above.
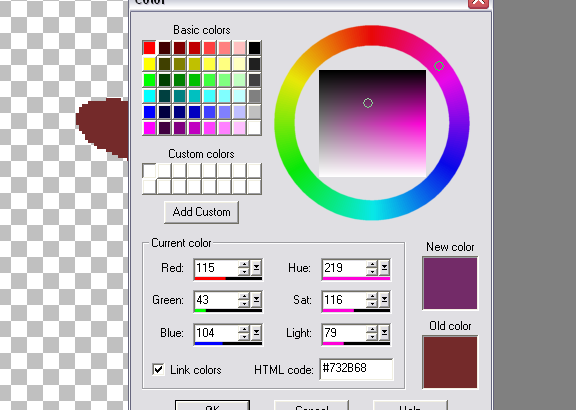
You'll see this little guy again, and yes, I'm going for another purple tone. What can I say, I'm addicted to the color!
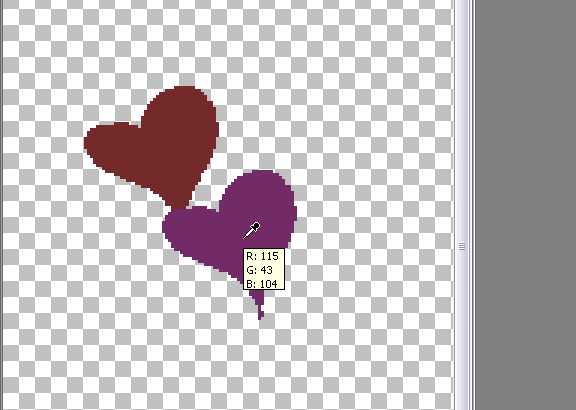
Now I hover over the heart with my little paint bucket and tada!
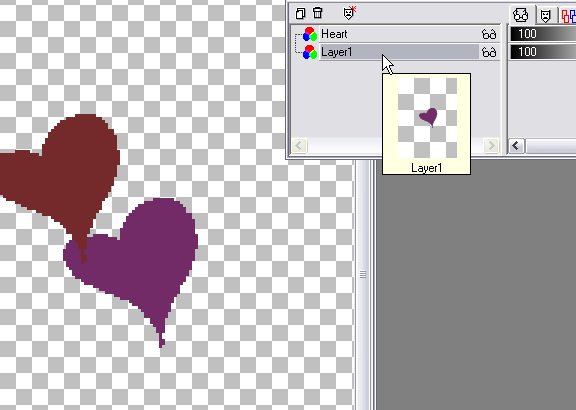
Just because we can, let's move the purple heart, below our red one.
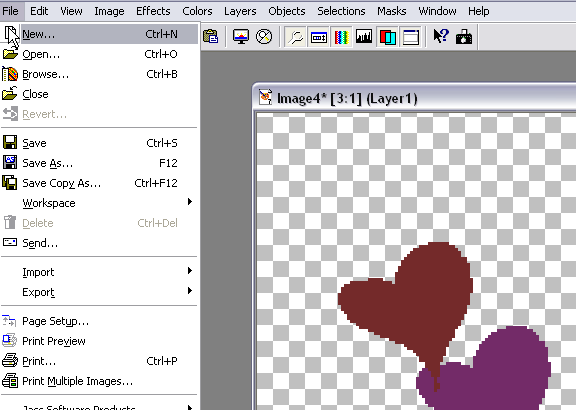
Now let's start a new project. You know what to do from here.
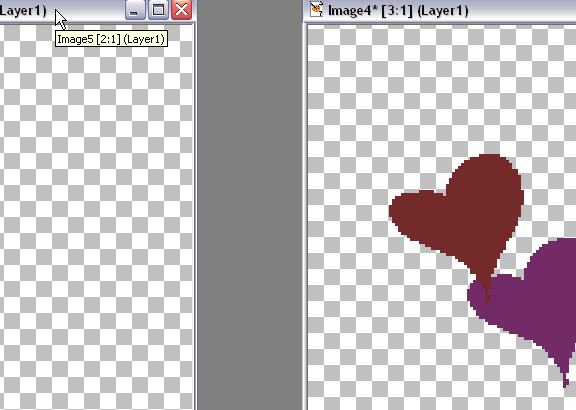
If you notice, I'm still on "Layer 1" which is the purple heart in my other canvas. Selecting my old canvas again (the ones with the hearts) I'm going to copy my purple heart. I'm not going to bore you with a spiffy printscreen on how to do this. I think you all get the jist of what to do. If not, just go to "Edit>Copy" or press Ctrl+C on your keyboard.
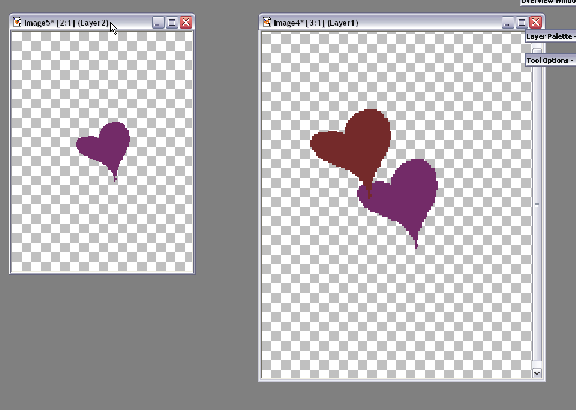
Now move over to your new canvas and either go to "Edit>Paste>As New Layer" or press "Ctlr+L" on your keyboard. Now I could have pasted the purple heart into a new canvas without actually going to "File>New". I could have done this by pressing "Ctrl+V" on my keyboard but eh... it's good to learn the long way of doing things too. Hehe.. And yes, sadly my friends, this is the end.


